
Colorful Crunchy Back-to-School Snack Bars
As the back-to-school season approaches, parents often find themselves on the lookout for nutritious snack options that can keep their children energized and focused throughout the day. Healthy snacks play a crucial role in supporting growing kids by providing the necessary nutrients they need to thrive academically and physically. One solution that stands out is the creation of homemade snack bars that are not only nutritious but also visually appealing.
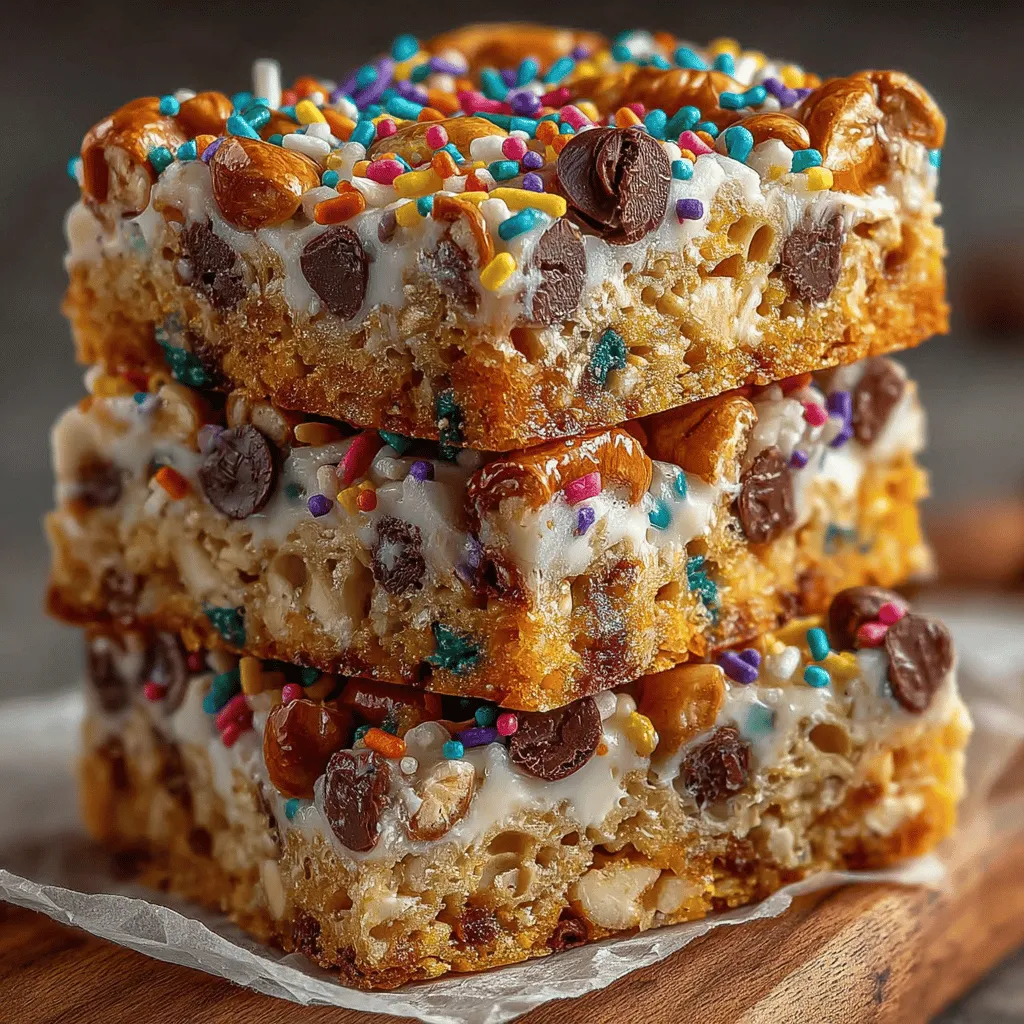
Introducing the Colorful Crunchy Back-to-School Snack Bars—a delightful fusion of taste and nutrition that will surely entice even the pickiest of eaters. These snack bars combine a variety of textures and flavors, making them not just a healthy choice, but a fun one too. With vibrant colors and a satisfying crunch, these bars are designed to make snack time exciting while offering wholesome ingredients that parents can feel good about.
For busy families, preparing snacks at home can sometimes feel overwhelming, but this recipe simplifies the process. With straightforward instructions and easily accessible ingredients, these homemade snack bars serve as a perfect solution for parents looking to provide their children with easy-to-make, nutritious snacks. Whether they are packed in lunch boxes, enjoyed after school, or eaten on-the-go, these bars will quickly become a staple in your household.
Understanding the Ingredients
Before diving into the step-by-step instructions for preparing these delightful snack bars, it’s important to understand the key ingredients that contribute to their nutritional profile. Each component plays a vital role in ensuring that the bars are not only tasty but also beneficial for your child’s health.
– Rolled Oats: A staple in many healthy recipes, rolled oats are an excellent source of dietary fiber, which is crucial for digestive health. They provide sustained energy, making them the perfect base for a snack that will keep your child feeling full and energized throughout their busy school day.
– Crispy Rice Cereal: This ingredient adds a light and crunchy texture to the bars. It’s a great way to enhance the crunch factor without adding excessive calories. Plus, it helps to balance the denser ingredients, creating a delightful eating experience.
– Honey or Maple Syrup: Natural sweeteners like honey or maple syrup not only add sweetness but also offer various health benefits. Honey has antibacterial properties and can help soothe a sore throat, while maple syrup contains antioxidants and minerals like manganese and zinc.
– Peanut Butter or Almond Butter: These nut butters are packed with protein and healthy fats, making them a great choice for growing children. They help to keep energy levels stable and can contribute to feelings of fullness.
– Cocoa Powder: Rich in antioxidants, cocoa powder adds a delicious chocolate flavor to the bars without the need for excessive sweeteners. It’s a guilt-free way to satisfy sweet cravings and can even enhance mood.
– Mini Chocolate Chips: While they add a fun element that appeals to kids, mini chocolate chips can be used sparingly to provide a sweet touch without overloading the bars with sugar.
– Dried Fruit: This ingredient not only contributes natural sweetness but also offers essential vitamins and minerals. Options like raisins, cranberries, or apricots can be included for added flavor and texture.
– Nuts: Whether you choose almonds, walnuts, or pecans, nuts are a fantastic source of healthy fats, protein, and various nutrients. They add a satisfying crunch and help to make the bars more filling.
– Vanilla Extract and Sea Salt: These two ingredients work to enhance the overall flavor profile of the bars. Vanilla extract adds depth, while a pinch of sea salt helps to balance the sweetness.
– Optional Sprinkles: For an extra touch of fun and visual appeal, consider adding colorful sprinkles. They can make the snack bars more enticing for kids, encouraging them to reach for a healthy option.
Step-by-Step Instructions
Now that we’ve covered the essential ingredients, let’s walk through the detailed preparation process to create these Colorful Crunchy Back-to-School Snack Bars. Following these steps will ensure that your bars turn out perfectly every time.
Preparing the Baking Pan
The first step in your snack bar creation journey is preparing the baking pan. Properly preparing your pan is crucial to ensure that your bars come out easily and retain their shape. Start by lining a square baking dish (typically 8×8 inches) with parchment paper. This will prevent the bars from sticking and make for an easier cleanup. Be sure to leave some overhang on the edges, as this will help you lift the bars out once they are set. For added security, lightly grease the parchment with a bit of cooking spray or oil.
Mixing Dry Ingredients
Next, it’s time to mix the dry ingredients. In a large mixing bowl, combine the rolled oats and crispy rice cereal. For an even distribution, it’s helpful to stir these ingredients together with a spatula or wooden spoon. If you’re adding nuts or dried fruit, toss those in at this stage as well. Mixing the dry ingredients thoroughly ensures that every bite of your snack bar is packed with flavor and goodness.
Combining Wet Ingredients
In another bowl, it’s time to work with the wet ingredients. Start by gently melting the peanut butter (or almond butter) together with the honey (or maple syrup) over low heat. This step is important as it helps to create a smoother mixture that will bind the dry ingredients together. Stir continuously until the mixture is well combined and has a creamy consistency.
Once melted, remove from heat and stir in the cocoa powder, vanilla extract, and a pinch of sea salt. The warmth of the melted mixture will help to dissolve the cocoa powder, ensuring a rich chocolate flavor throughout the bars. Take your time with this step to achieve the best texture and flavor.
The next part of this recipe will encompass how to combine these mixtures and finalize the preparation of your snack bars. Stay tuned for the continuation of this delicious adventure into healthy snacking!
Merging Dry and Wet Mixtures: Achieving the Right Consistency
Once you have your dry ingredients prepared, it’s time to combine them with the wet mixture. This step is crucial for achieving the right consistency, which ensures that your snack bars hold together perfectly. Begin by pouring the wet mixture — typically a blend of nut butter, sweetener like honey or maple syrup, and vanilla extract — into the bowl containing your dry ingredients.
Using a spatula or large wooden spoon, gently fold the wet mixture into the dry ingredients. Be sure to scrape down the sides of the bowl to incorporate all the ingredients evenly. The goal is to create a thick, cohesive mixture that clumps together but is not overly sticky. If the mixture feels too dry and crumbly, you can add a small splash of water or additional nut butter to help it bind. Conversely, if it’s too wet, a little extra oats or cereal can help balance it out.
Setting the Mixture: Importance of Firm Pressing for the Perfect Bar
After merging the dry and wet mixtures, it’s essential to transfer the mixture into your prepared baking pan. To achieve the perfect snack bar, you must press the mixture firmly into the pan. This step helps to compact the ingredients together, ensuring that the bars don’t crumble apart when cut.
Using a piece of parchment paper or wax paper, cover the mixture and press down with your hands or a flat object, like the bottom of a measuring cup. Make sure to spread the mixture evenly and press firmly into the corners of the pan. A well-packed mixture will result in denser, more uniform bars that are easier to cut and serve.
Chilling the Bars: How Chilling Affects Texture and Ease of Cutting
Once you’ve pressed the mixture firmly into the pan, it’s time to chill it. Refrigerating the bars for at least two hours (or even overnight) is vital for the texture and cutting process. Chilling allows the ingredients to firm up, making it easier to slice into bars without crumbling.
The cool temperature helps solidify the nut butter and sweetener, creating a chewy yet firm texture that kids will love. If you’re short on time, you can place the bars in the freezer for about 30 minutes instead, but be sure to monitor them closely to avoid freezing solid.
Cutting and Storage: Best Practices for Keeping the Bars Fresh
Once your bars are chilled and set, it’s time to cut them into perfect snack-sized pieces. Use a sharp knife to slice the bars into rectangles or squares, depending on your preference. It’s often helpful to run the knife under hot water before cutting, as this makes for cleaner edges.
For storage, place the cut bars in an airtight container to keep them fresh. They can be stored in the refrigerator for up to a week or at room temperature for a few days, depending on the ingredients used. For longer storage, consider wrapping each bar in parchment paper or plastic wrap, then placing them in a freezer-safe bag. This way, you can grab a bar whenever you need a quick snack.
Serving Suggestions: Creative Ways to Present the Snack Bars
When it comes to serving these colorful, crunchy snack bars, presentation can elevate the experience. Here are a few creative ideas:
1. Snack Packs: Place individual bars in small bags and pack them into lunch boxes for a fun, grab-and-go option.
2. Fruit Pairing: Serve the bars alongside fresh fruit, like apple slices or banana halves, for a balanced snack.
3. Dipping Delight: Offer a side of yogurt or a homemade fruit dip for kids to enjoy with their bars.
4. Themed Parties: Cut the bars into fun shapes using cookie cutters for birthday parties or school events.
Nutritional Information
Breakdown of Nutritional Value per Serving of the Snack Bars
Each serving of these Colorful Crunchy Back-to-School Snack Bars offers a nutritious blend of macronutrients. On average, one bar contains approximately:
– Calories: 150-200
– Protein: 4-6 grams
– Carbohydrates: 20-25 grams
– Fat: 6-10 grams
– Fiber: 2-4 grams
These bars are not only delicious but also a source of energy and nutrients for busy kids.
Discussion on Portion Control and Its Significance for Children’s Diets
When it comes to children’s diets, portion control is essential. These snack bars are designed to be filling yet nutritious, making them a great option for after-school snacks or lunchbox treats. By controlling the size of each bar, you can help children learn about appropriate serving sizes while still providing them with the energy needed for their activities.
Highlight the Health-Conscious Aspects of the Recipe
One of the most appealing aspects of these snack bars is their health-conscious ingredients. You can easily adjust the recipe to meet various dietary needs:
– Gluten-Free Options: By using certified gluten-free oats and cereals, you can create a wholesome snack for gluten-sensitive kids.
– Nut-Free Alternatives: For children with nut allergies, substitute nut butter with sunflower seed butter or pumpkin seed butter without compromising taste.
– Natural Sweeteners: The recipe can be adapted to use less sweetener or alternative options like mashed bananas or applesauce, providing natural sweetness without added sugars.
Creative Variations
Suggest Alternatives for Various Dietary Preferences
These snack bars are incredibly versatile, making them easy to modify based on individual dietary preferences:
– Gluten-Free Options: Stick to gluten-free oats and cereals, ensuring that all ingredients are certified gluten-free.
– Nut-Free Alternatives: Use seed butters instead of traditional nut butters to accommodate nut allergies.
– Flavor Variations: Mix in spices such as cinnamon or pumpkin pie spice for an extra flavor kick, or experiment with different nut butters like almond or cashew for unique taste profiles.
The Benefits of Homemade Snacks
Making snacks at home provides numerous advantages over store-bought options:
– Control Over Ingredients: Homemade snacks allow you to choose high-quality ingredients, avoiding preservatives and artificial additives often found in commercial products.
– Customization: You can tailor the flavors and textures to suit your family’s preferences, making healthy eating more enjoyable.
– Cost-Effectiveness: Preparing snacks in bulk can save money compared to purchasing pre-packaged bars, especially when feeding a family.
Conclusion
The Colorful Crunchy Back-to-School Snack Bars offer an excellent way to provide children with a nutritious, fun, and easy snack. With a range of creative variations and the ability to accommodate various dietary preferences, these bars are not only appealing but also a great addition to any lunchbox or after-school treat.
Encourage your kids to join in the preparation process, allowing them to explore ingredient options and customize their bars. Trying this recipe can show them that healthy eating can be both enjoyable and satisfying. We invite you to give this recipe a try and share your experiences. Healthy snacks can be delicious, colorful, and a hit among children!
