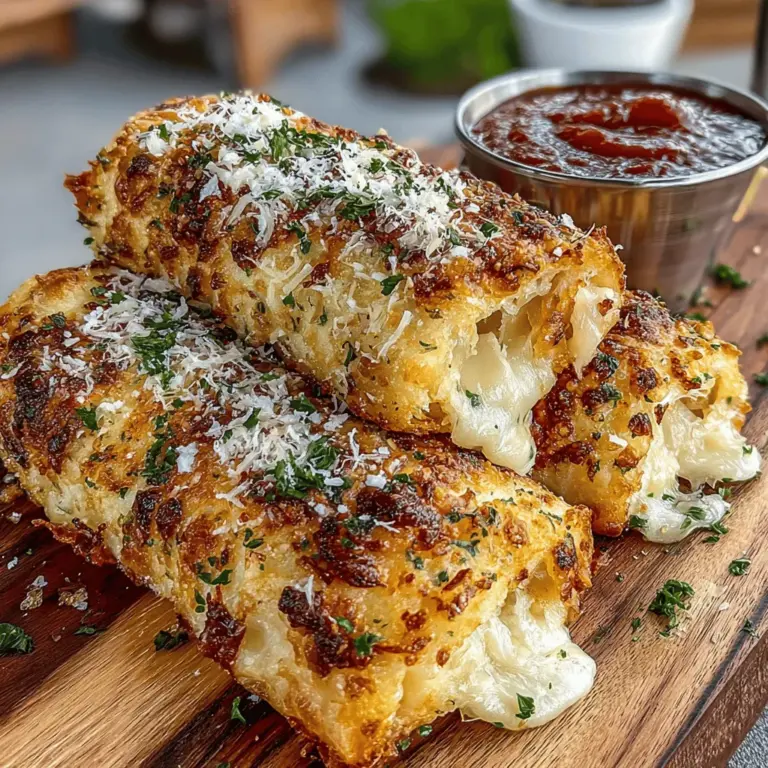
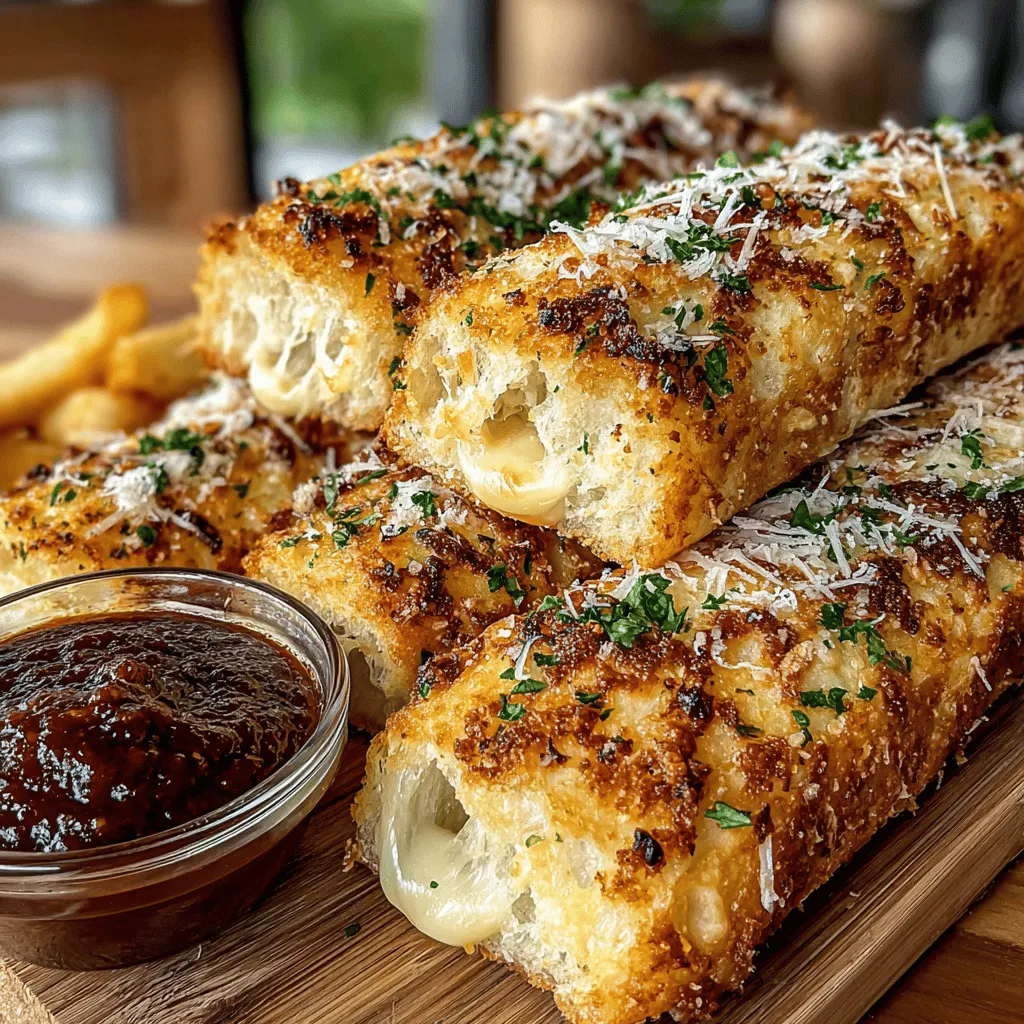
Golden Garlic Breadsticks: A Delicious Homemade Delight
There’s something truly magical about the aroma of homemade garlic breadsticks wafting through your kitchen. Whether served as an appetizer, a side dish, or a comforting snack, garlic breadsticks are a quintessential part of many meals. Their golden, crispy exteriors and soft, fluffy interiors make them a favorite for everyone. When you create them from scratch, you elevate this classic dish to new heights, making it a delightful treat that’s hard to resist.
Baking garlic breadsticks at home not only allows you to control the ingredients but also gives you the satisfaction of crafting something delicious right from your kitchen. Using fresh ingredients is key to achieving that restaurant-quality flavor and texture. When you make your own breadsticks, you can tailor them to your taste preferences, ensuring that each bite is bursting with flavor.
The recipe for Golden Garlic Breadsticks is straightforward, making it accessible even for novice bakers. With just a handful of ingredients and simple steps, you can create a batch of breadsticks that will impress your family and friends. The blend of garlic, butter, and herbs creates a mouthwatering experience that perfectly complements any meal.
Understanding the Ingredients
To make the best Golden Garlic Breadsticks, it’s important to understand the role of each ingredient in the recipe. This knowledge will not only help you appreciate the dish more but also enable you to make any necessary adjustments to suit your taste.
All-Purpose Flour
The foundation of any bread recipe is flour, and all-purpose flour is an excellent choice for garlic breadsticks. This flour provides the right balance of protein and gluten, which is essential for the texture of the breadsticks. It allows the dough to rise properly, resulting in a chewy yet tender bite. The gluten development during kneading is what gives bread its characteristic structure and elasticity.
Yeast
Yeast is the magical ingredient that brings bread to life. It is a living organism that ferments sugars, producing carbon dioxide gas that causes the dough to rise. This process is what gives bread its light and airy texture. For our garlic breadsticks, using active dry yeast or instant yeast will work well. The yeast must be properly activated, which is crucial for achieving that fluffy texture.
Sugar and Salt
Sugar and salt might seem like simple ingredients, but they play vital roles in enhancing the flavor of your breadsticks. Sugar feeds the yeast, promoting fermentation and contributing to the dough’s rise. It also adds a hint of sweetness that complements the savory garlic flavor. On the other hand, salt is essential for balancing flavors and controlling the fermentation process. It strengthens the dough and helps to develop a more complex flavor profile.
Warm Water and Milk
The temperature of the liquids you use can significantly impact the yeast activation process. Warm water (around 110°F) is ideal for activating yeast, as it creates a favorable environment for fermentation. Milk adds richness and moisture to the dough, resulting in a softer texture. Combining warm water and milk in your recipe helps create a tender breadstick that’s full of flavor.
Olive Oil
Olive oil is not just a flavorful addition; it also contributes to the moisture content of the dough. It helps keep the breadsticks soft and adds a rich, aromatic element that enhances the overall taste. The use of high-quality extra virgin olive oil can elevate the flavor profile, making your garlic breadsticks truly memorable.
Garlic and Herbs
Garlic is the star of this recipe, providing the signature flavor that garlic breadsticks are known for. Fresh minced garlic infuses the dough with its pungent aroma and taste. Additionally, incorporating herbs such as parsley or oregano can enhance the flavor and add a touch of freshness. These aromatic ingredients create a depth of flavor that elevates the breadsticks beyond the ordinary.
Optional Ingredients
For those who enjoy a bit of heat, adding red pepper flakes to the dough can give your garlic breadsticks a subtle kick. Likewise, sprinkling grated Parmesan cheese on top before baking adds a savory, cheesy finish that complements the garlic beautifully. These optional ingredients allow you to customize your breadsticks to suit your palate.
Step-by-Step Instructions
Now that we understand the ingredients, let’s dive into the step-by-step instructions for making Golden Garlic Breadsticks. This process will guide you through activating the yeast, mixing the dough, and preparing it for baking.
Activating the Yeast
The first step in creating your garlic breadsticks is to activate the yeast. Start by measuring out warm water and combining it with a small amount of sugar in a bowl. Sprinkle the yeast on top of the water and let it sit for about 5-10 minutes. You’ll know the yeast is activated when it becomes frothy and bubbly, indicating that it’s alive and ready to work its magic.
Mixing the Dough
Once your yeast is activated, it’s time to mix the dough. In a large mixing bowl, combine the all-purpose flour and salt. Create a well in the center and pour in the activated yeast mixture, warm milk, and olive oil. Using a wooden spoon or a dough hook attached to a stand mixer, start mixing the ingredients together until they begin to form a cohesive dough.
Achieving the Right Consistency
As you mix, be mindful of the dough’s consistency. It should be slightly sticky but not too wet. If the dough feels too tacky, add a little more flour, one tablespoon at a time, until you reach the desired texture. Conversely, if the dough is too dry, a splash of warm water can help bring it together.
Kneading the Dough
Once the dough has come together, it’s time to knead. Turn it out onto a lightly floured surface and begin kneading by pushing the dough away from you with the heel of your hand, then folding it back over itself. Rotate the dough a quarter turn and repeat this motion. Kneading helps develop the gluten, which is crucial for the bread’s texture.
Identifying the Right Texture
Knead the dough for about 8-10 minutes, or until it becomes smooth and elastic. You can test if it’s ready by performing the “windowpane test.” Stretch a small piece of dough between your fingers; if it forms a thin, translucent membrane without tearing, it’s ready for the next step. This indicates that the gluten has developed sufficiently.
The First Rise
Once your dough is kneaded to perfection, it’s time for the first rise. Place the dough in a lightly greased bowl, cover it with a clean kitchen towel or plastic wrap, and set it in a warm, draft-free area. Allow the dough to rise until it has doubled in size, which typically takes about 1 to 1.5 hours. This step is crucial for creating fluffy, airy breadsticks.
As you wait for the dough to rise, the anticipation builds. The transformation from a simple mixture of flour and water into a soft, pillowy dough is a rewarding part of the baking process. Stay tuned for the next steps, where we will shape the dough, prepare it for baking, and finally indulge in the delightful Golden Garlic Breadsticks.
The Importance of Covering and Placement
When it comes to creating the perfect golden garlic breadsticks, the significance of covering the dough during its rising stages cannot be overstated. Covering the dough with a clean kitchen towel or plastic wrap helps to retain moisture, preventing the surface from drying out and forming a crust. This ensures a soft and fluffy texture in the final product.
Placement is equally crucial; the dough should be placed in a warm, draft-free area. A common trick is to turn on your oven to its lowest setting for a minute or two, then turn it off and place the dough inside. This creates a warm environment that promotes yeast activity, allowing the dough to rise effectively.
Preparing the Garlic Butter
The flavor of garlic breadsticks largely comes from the garlic butter. To prepare it, start by melting unsalted butter in a small saucepan over low heat. Once melted, add minced garlic—fresh garlic is ideal, as it provides a robust flavor. Allow the garlic to sauté gently in the butter for about 1-2 minutes, just until fragrant; be careful not to let it brown, as burnt garlic can impart a bitter taste.
After removing it from heat, stir in a pinch of salt and freshly chopped parsley or dried Italian herbs for an extra flavor boost. This garlic butter mixture is not only for brushing on the breadsticks before baking but can also be used as a dipping sauce.
Choosing the Right Pan and Heat Level
Selecting the right baking pan is essential for achieving the desired texture of your garlic breadsticks. A light-colored, non-stick baking sheet works best, as it helps reflect heat, preventing the bottoms from burning while allowing the breadsticks to bake evenly.
When it comes to heat, preheat your oven to 375°F (190°C). This temperature allows for a golden exterior while keeping the inside soft and chewy. If you want an extra crispy exterior, consider placing your pan on the middle rack and potentially switching the oven to broil for the last minute or two of baking—just keep a close eye on them to prevent burning.
Balancing Flavors with Herbs and Spices
To elevate the flavor profile of your garlic breadsticks, consider adding a mix of herbs and spices. While garlic and butter are essential, additional herbs such as oregano, thyme, or basil can add depth. A sprinkle of red pepper flakes can introduce a hint of heat, while a touch of grated Parmesan cheese mixed into the garlic butter can impart a savory, cheesy flavor that complements the breadsticks perfectly.
Shaping the Breadsticks
Once your dough has risen, it’s time to shape your breadsticks. Begin by gently deflating the dough on a floured surface. Divide it into equal pieces, typically about 10-12, depending on your preferred size. Roll each piece into a long, thin strip—aim for about 1/2 inch thick and 8-10 inches long. The strips don’t need to be perfect; slight variations in thickness can add to the rustic charm of homemade breadsticks.
Techniques for Cutting and Forming Uniform Pieces
For uniformity, use a sharp knife or dough cutter to divide the dough into equal portions. If you prefer a more traditional look, you can twist each strip gently before placing them on the baking sheet. This not only adds visual appeal but also allows for better absorption of the garlic butter during baking.
The Second Rise: Importance of Patience
After shaping the breadsticks, they should undergo a second rise, which is crucial for achieving the perfect texture. Let them rest for another 20-30 minutes, covered with a towel. This step allows the gluten to relax, resulting in a softer, fluffier breadstick. Patience is key here; don’t skip this step if you desire that deliciously airy texture.
How This Step Affects the Final Product
The second rise allows the yeast additional time to create gas bubbles, which will expand during baking. If you rush this process, your breadsticks may end up dense and chewy rather than light and airy. The resulting fluffiness and golden-brown crust will be worth the wait.
Preheating the Oven: Why Temperature Matters
Preheating the oven is essential for baking breadsticks. An adequately heated oven ensures that the breadsticks rise properly as they bake, leading to a light, fluffy texture. Place the oven rack in the center position to promote even heat distribution.
Brushing and Baking
Before placing your shaped breadsticks in the oven, brush them generously with the prepared garlic butter. Use a pastry brush to ensure even application, covering the tops and sides thoroughly. This not only enhances the flavor but also contributes to a beautiful, golden color during baking.
Techniques for Even Application of Garlic Butter and Cheese
If you choose to sprinkle cheese on top, do so after brushing with garlic butter. This method allows the cheese to melt beautifully and form a delightful crust. For an added layer of flavor, consider mixing herbs into the cheese before sprinkling it over the breadsticks.
Final Baking: Recognizing Doneness
Bake the breadsticks in your preheated oven for about 15-20 minutes, or until they are golden brown and the edges are crispy. Keep an eye on them, as oven temperatures can vary. A good indication that they are done is the irresistible aroma filling your kitchen and a slight firmness when gently pressed.
Serving Suggestions
Traditional Pairings: Marinara Sauce and Other Dips
Golden garlic breadsticks are incredibly versatile and can be served with a variety of dips. The classic pairing is marinara sauce, which complements the garlic and herb flavors beautifully. Additionally, consider serving them with creamy ranch dressing, a zesty pesto, or a rich cheese dip for added indulgence.
Creative Serving Ideas: Adding Toppings or Sauces
For a gourmet twist, drizzle the breadsticks with balsamic glaze or top them with fresh mozzarella cheese before baking. You can also experiment with different toppings, such as crushed red pepper, sesame seeds, or even a sprinkle of everything bagel seasoning for an added crunch and flavor.
Ideal Occasions for Serving Garlic Breadsticks
These delicious garlic breadsticks are perfect for a variety of occasions. They make an excellent side for Italian dishes such as spaghetti or lasagna, and they are a hit at family dinners or potluck gatherings. You can also serve them as an appetizer at parties or casual get-togethers, making sure there’s plenty of dipping sauce on hand.
Nutritional Information
Overview of the Nutritional Value Per Serving
While these garlic breadsticks are a delightful treat, it’s essential to be mindful of their nutritional content. A standard serving of one breadstick typically contains around 150 calories, 6g of fat, and 20g of carbohydrates, depending on the specific ingredients you use.
Discussion on Potential Substitutions for Healthier Options
If you are looking to make your garlic breadsticks a bit healthier, consider swapping out all-purpose flour for whole wheat flour, which increases the fiber content. You can also reduce the amount of butter by using a light spread or substituting with olive oil for a healthier fat option. Adjusting the amount of cheese or using low-fat cheese can further reduce calories while still offering great flavor.
Conclusion
Making golden garlic breadsticks at home is not only a rewarding experience but also a delightful way to bring warmth and comfort to your dining table. The joy of sharing freshly baked bread with family and friends is unparalleled. As you experiment with flavors and toppings, you’ll discover endless possibilities to customize your garlic breadsticks to your taste.
So, roll up your sleeves, gather your ingredients, and embark on this delicious baking adventure! Whether for a cozy family dinner or a festive gathering, these garlic breadsticks are sure to impress and become a staple in your home-cooked repertoire. Happy baking!
