Crispy Delight Garlic Breadsticks Recipe: A Perfect Appetizer
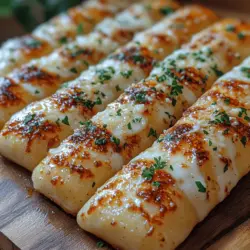
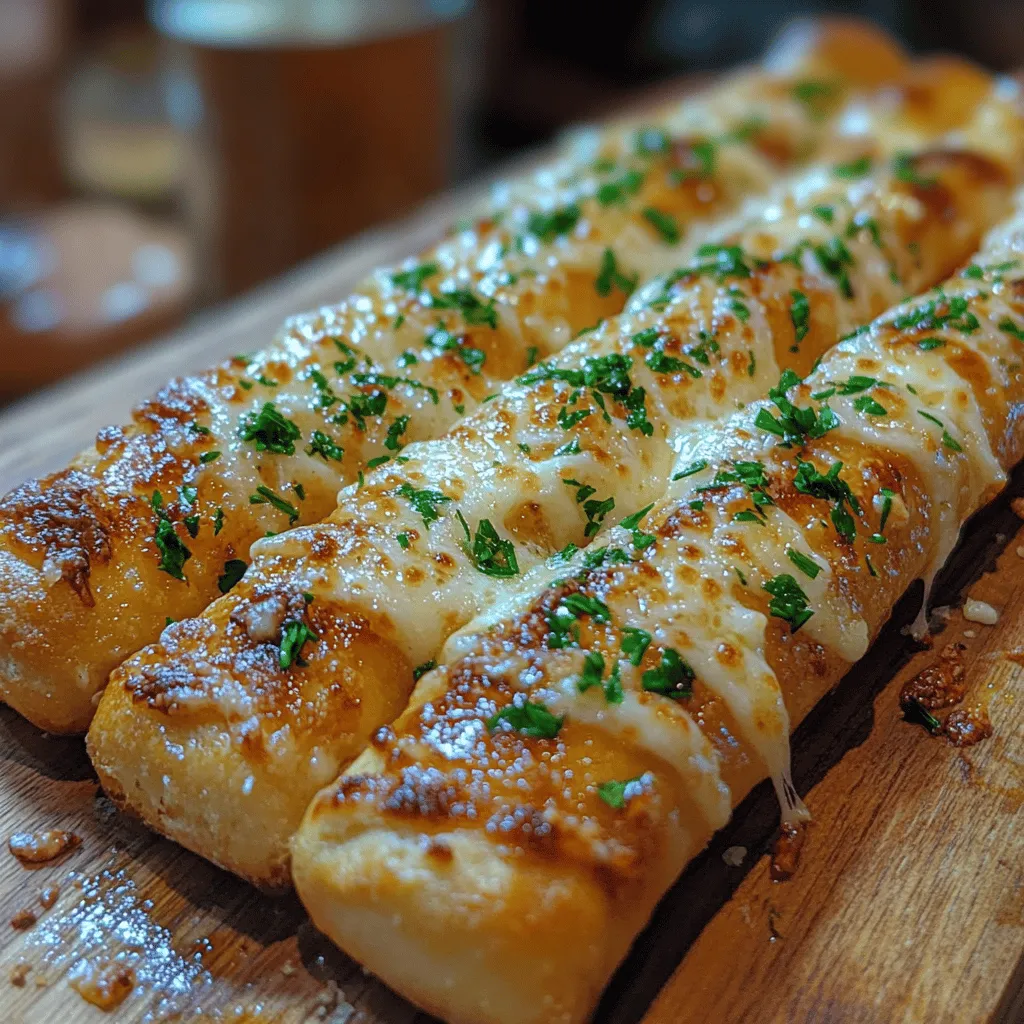
Garlic breadsticks have earned their place as a staple in many households and restaurants, adored for their irresistible combination of flavors and textures. Whether served as an appetizer before a family meal, a side dish to accompany a hearty soup, or a snack at a gathering, these crispy delights are always a welcome addition to any table. Their popularity can be attributed to the delightful aroma of garlic, the satisfying crunch on the outside, and the soft, chewy interior that beckons for a dip in marinara sauce or a spread of creamy butter.
While store-bought options may be convenient, nothing beats the taste and satisfaction of homemade garlic breadsticks. With a few simple ingredients and a little bit of time, you can create a batch that rivals any restaurant’s offering. The appeal of baking them yourself lies not only in the freshness but also in the ability to customize flavors and textures to suit your preferences. Imagine pulling a tray of golden-brown breadsticks from the oven, the smell of garlic wafting through your kitchen, enticing everyone to gather around the table.
These garlic breadsticks are incredibly versatile, making them perfect for various occasions. Whether you’re hosting a casual dinner party, preparing for a game night with friends, or simply enjoying a cozy meal with family, they can easily adapt to fit the mood. Pair them with a zesty marinara sauce for an Italian-themed evening or serve them alongside a rich, creamy soup for comfort on a chilly day. No matter the setting, these breadsticks are sure to elevate your dining experience.
Understanding the Ingredients
To create the perfect crispy garlic breadsticks, it’s essential to understand the role of each ingredient in the recipe. Here’s a closer look at the key components that come together to make these delightful treats:
– All-Purpose Flour: This is the backbone of your breadsticks. All-purpose flour has the right balance of protein content that is crucial for gluten development in bread-making. Gluten is what gives bread its structure and chewiness, allowing the breadsticks to rise beautifully and hold their shape.
– Instant Yeast: The magic of rising in bread comes from yeast, and instant yeast is particularly user-friendly. It activates quickly, allowing for faster fermentation and rising. This means you can have fresh garlic breadsticks on the table in less time, making it ideal for those who want delicious results without the long wait.
– Olive Oil: This ingredient not only enhances the flavor of the breadsticks but also contributes to their texture. Olive oil helps to create a tender crumb and adds a delightful richness. Additionally, it aids in browning the exterior, giving the breadsticks that coveted crispy texture.
– Garlic: The star of the show, garlic, infuses the breadsticks with its distinct flavor. Whether you use fresh garlic cloves, minced garlic, or even roasted garlic, this ingredient elevates the taste profile of the breadsticks. The aroma of garlic wafting through your kitchen will have everyone’s mouth watering in anticipation.
– Parmesan Cheese: For an added layer of richness and umami, Parmesan cheese is a fantastic addition. It melts beautifully into the dough, creating pockets of flavor throughout the breadsticks. The salty, nutty notes of Parmesan complement the garlic perfectly.
– Fresh Parsley: This herb serves a dual purpose: it adds a pop of color and a subtle freshness to the breadsticks. Chopped parsley sprinkled on top before serving not only enhances the visual appeal but also brightens the overall flavor.
When preparing to make these garlic breadsticks, it’s important to consider any dietary restrictions. If you’re looking for gluten-free options, you can substitute the all-purpose flour with a gluten-free blend designed for baking. For those avoiding dairy, a vegan cheese alternative can be used in place of Parmesan, and olive oil can be replaced with a plant-based butter for a similar effect.
Step-by-Step Instructions
Now that we’ve covered the essentials of the ingredients, let’s dive into the step-by-step process of creating these crispy garlic breadsticks. Each step is crucial for achieving the perfect texture and flavor.
Preparing the Dough
The journey to delicious garlic breadsticks begins with the dough. Start by measuring out the all-purpose flour and placing it in a large mixing bowl. Make a well in the center and add the instant yeast, followed by warm water (ideally around 110°F/43°C) and a pinch of salt. The warmth of the water activates the yeast, setting the fermentation process in motion. Begin by mixing the ingredients together until they form a shaggy dough.
Kneading
Kneading is a vital step in developing the gluten network that will give your breadsticks their structure. Once the ingredients are combined, turn the dough onto a lightly floured surface and start kneading. Use the heel of your hand to push the dough away from you, then fold it back over itself and repeat this process for about 8-10 minutes. The dough should become smooth and elastic, indicating that the gluten has developed adequately. If the dough is too sticky, sprinkle a little more flour as needed, but be careful not to overdo it, as too much flour can lead to dense breadsticks.
Rising Times
After kneading, place the dough in a lightly greased bowl, cover it with a damp cloth or plastic wrap, and let it rise in a warm environment until it doubles in size. This typically takes about 1 to 1.5 hours, depending on the temperature of your kitchen. Allowing the dough to rise properly is essential for achieving that light, airy texture in your finished breadsticks. The fermentation process during this time develops the flavor of the bread and creates the perfect texture.
As you wait for the dough to rise, the anticipation builds, and the aroma of garlic and herbs begins to fill your kitchen. This is just the beginning of creating a delicious side dish that will leave a lasting impression on your guests. Stay tuned for the next part of the recipe, where we will shape and bake these crispy garlic breadsticks to perfection.
Shaping the Breadsticks
Once your dough has risen beautifully, it’s time to shape your garlic breadsticks. Proper shaping is essential to achieve even sizes and ensure uniform baking, which contributes to that delightful crunch.
Techniques for Achieving Even Sizes
1. Divide the Dough: Start by punching down the risen dough to release any air bubbles. Transfer it to a lightly floured surface and divide it into equal portions. For standard-sized breadsticks, aim for pieces that weigh about 2 ounces each. This will yield approximately 10-12 breadsticks, depending on your preference.
2. Roll and Stretch: Take one piece of dough and flatten it slightly with your fingers. Using your hands, roll it into a long rope shape, about 8-10 inches in length. To ensure even thickness, you can use a rolling pin if you prefer. Just be gentle to maintain the airiness of the dough.
3. Rest the Shaped Dough: Place the shaped breadsticks on a parchment-lined baking sheet, leaving space between each stick for expansion during baking. Cover them with a clean kitchen towel and let them rest for about 15-20 minutes to allow the gluten to relax, which will result in softer breadsticks.
Adding Flavors
Flavor is what elevates your garlic breadsticks from simple to sensational. The key to infusing that robust garlic taste is through garlic oil.
How to Properly Incorporate Garlic Oil for Maximum Taste
1. Create Garlic Oil: In a small saucepan, combine 1/2 cup of olive oil and 4-5 cloves of minced garlic. Heat over low heat for about 5-7 minutes, allowing the garlic to infuse the oil without browning it. This process releases the essential oils from the garlic and creates a flavorful base.
2. Brush Generously: Once your breadsticks are shaped and resting, use a pastry brush to generously apply the garlic oil mixture over each stick. Make sure to coat the tops and sides well, as this will not only enhance flavor but also contribute to a beautiful golden crust during baking.
3. Seasoning: After applying the garlic oil, sprinkle a pinch of salt and a dash of dried Italian herbs or parsley over the breadsticks. This adds an extra layer of flavor that perfectly complements the garlic.
Baking
The baking process is crucial for achieving that perfect golden crust we all crave in garlic breadsticks.
Tips for Achieving the Perfect Golden Crust
1. Preheat the Oven: Ensure that your oven is fully preheated to 400°F (200°C) before placing the breadsticks inside. A hot oven helps create a crispy exterior while keeping the inside soft and fluffy.
2. Use Parchment Paper: Baking your breadsticks on parchment paper not only prevents sticking but also helps in achieving an even bake. If you don’t have parchment, lightly grease the baking sheet with olive oil.
3. Monitor Baking Time: Bake the breadsticks for about 15-20 minutes or until they are golden brown. Keep an eye on them towards the end of the baking time to prevent burning. The perfect breadsticks should have a crispy exterior and a soft, chewy interior.
4. Broil for Extra Crispiness: If you desire an extra crispy finish, consider broiling the breadsticks for the last 1-2 minutes of baking. Watch them closely to avoid over-browning.
Visual Aids for Each Step
Incorporating visual aids like photos or videos can greatly enhance understanding. Consider taking pictures of each shaping stage, the garlic oil preparation, and the final baked product. These visuals not only serve as a guide but also inspire confidence in your readers to replicate the recipe successfully.
Tips for Perfect Garlic Breadsticks
Even the best recipes can have pitfalls. Here are some tips to ensure your garlic breadsticks turn out perfectly every time.
Common Pitfalls to Avoid During the Dough-Making Process
– Overworking the Dough: Kneading dough too much can lead to a tough texture. Aim for a smooth consistency without excessive kneading.
– Insufficient Rising: Be patient during the dough rising phase. Under-risen dough will result in denser breadsticks. Ensure your dough doubles in size before proceeding to shape.
Importance of Temperature and Timing in Dough Rising
– Warm Environment: Dough rises best in a warm, draft-free environment. If your kitchen is cold, consider placing the dough in an oven with the light on to create a warm atmosphere.
– Timing: Allow enough time for the dough to rise. Rushing this process can lead to disappointing results.
How to Tell When the Breadsticks Are Perfectly Baked
– Color Check: Look for a golden-brown color on the top and sides of the breadsticks.
– Sound Test: Tap the bottom of a breadstick; a hollow sound indicates doneness.
– Texture: The exterior should feel crispy, while the inside remains soft and airy.
Serving Suggestions and Pairings
Garlic breadsticks are not just a standalone treat; they can enhance any meal. Here are some serving suggestions that elevate the dining experience.
Ideas for Dips That Complement Garlic Breadsticks
– Marinara Sauce: A classic pairing, this tangy tomato sauce complements the garlic flavor beautifully.
– Alfredo Sauce: For a creamy accompaniment, serve with a rich Alfredo sauce for dipping.
– Pesto: The herby freshness of pesto provides a delightful contrast to the garlic.
Suggested Main Dishes to Pair with Garlic Breadsticks
– Pasta Dishes: Serve alongside spaghetti marinara or fettuccine Alfredo for a complete Italian feast.
– Soup: Pair with a hearty tomato basil soup or creamy potato soup for a comforting meal.
– Salads: Garlic breadsticks can add a crunchy element to a fresh garden salad or Caesar salad.
Creative Serving Ideas for Various Occasions
– Parties and Gatherings: Arrange the breadsticks in a basket lined with a cloth for a rustic presentation at your next gathering.
– Family Dinners: Offer garlic breadsticks as a side to weeknight meals, enhancing your family dinner experience.
– Themed Nights: Use them as an appetizer for Italian-themed nights, paired with an array of authentic Italian dishes.
Nutritional Information
Understanding the nutritional content of your garlic breadsticks can help you enjoy them guilt-free.
Breakdown of Calories and Key Nutrients Per Serving
For a serving of two breadsticks, you can expect approximately:
– Calories: 150-200
– Carbohydrates: 25-30g
– Protein: 3-5g
– Fat: 6-10g (depending on the amount of oil used)
– Fiber: 1g
Discussion on the Health Aspects of the Ingredients Used
– Whole Wheat Flour: Opting for whole wheat flour can increase the fiber content, making the breadsticks a healthier choice.
– Olive Oil: This heart-healthy fat is rich in antioxidants and can provide various health benefits when used in moderation.
Tips for Making the Recipe Healthier Without Sacrificing Taste
– Reduce Oil: Use less garlic oil or substitute half with water to lower the fat content.
– Add Whole Grains: Incorporate whole grain flour for added nutrients.
– Use Fresh Garlic: Fresh garlic not only provides better flavor but also has health benefits compared to powdered forms.
Conclusion
There’s something immensely satisfying about making homemade crispy garlic breadsticks that are both easy and delicious. The aroma of garlic wafting through your kitchen, the joy of shaping the dough, and the anticipation of that first bite are experiences to cherish.
We encourage you to try this recipe and indulge in the delightful crunch and flavor of your own garlic breadsticks. They are a perfect addition to any meal or gathering, celebrating the simplicity and satisfaction of homemade cooking. Whether you enjoy them as an appetizer, side dish, or snack, these garlic breadsticks are sure to impress. Enjoy the process, share with loved ones, and relish the deliciousness!