Crispy Golden Brown Onion Rings Recipe
Onion rings are undoubtedly one of the most beloved snacks and side dishes. Their crispy exterior and tender interior make them a delightful treat that can elevate any meal—from burgers and sandwiches to salads and fish. While you can find onion rings on many restaurant menus, there’s something uniquely satisfying about making them at home. When you prepare onion rings yourself, you have complete control over the ingredients, ensuring freshness and flavor that is often unmatched by their store-bought counterparts. Additionally, homemade onion rings allow you to customize the seasonings and batter to suit your taste, resulting in a snack or side dish that is both delicious and personal.
This Crispy Golden Brown Onion Rings recipe is simple yet rewarding, making it a perfect culinary endeavor for both novice and experienced cooks alike. With just a handful of ingredients and some straightforward steps, you can whip up a batch of crispy, golden-brown onion rings that will impress your family and friends. Whether you’re hosting a game day gathering, preparing a casual dinner, or simply satisfying a craving, these onion rings are sure to be a hit.
Understanding the Ingredients
Before diving into the preparation steps, it’s essential to understand the key ingredients that contribute to the perfection of onion rings. Each component plays a crucial role in achieving the desired flavor, texture, and overall quality of the dish.
Yellow Onions
The star of the show in any onion ring recipe is, of course, the onion itself. Yellow onions are the preferred choice for onion rings due to their balanced flavor profile. They possess a perfect combination of sweetness and sharpness, which caramelizes beautifully when fried. Their natural sugars enhance the overall taste of the onion rings, providing a delicious bite that complements the crispy batter.
All-Purpose Flour
All-purpose flour is a vital ingredient in creating the batter that coats the onion rings. It provides the necessary structure and helps achieve that coveted crispiness. When fried, the flour creates a crunchy exterior that encases the sweet, tender onion within. Its versatility makes it a staple in many cooking and baking recipes, including this one.
Baking Powder
Baking powder plays an essential role in achieving fluffiness and lightness in the batter. When heated, the baking powder releases carbon dioxide, which creates tiny air pockets in the batter. This results in a lighter and crispier texture that makes each bite of your onion rings delightful. Without it, the batter could become dense and heavy, leading to less-than-ideal results.
Seasonings (Garlic Powder, Paprika, Salt, Black Pepper)
To enhance the flavor and aroma of the onion rings, a blend of seasonings is added to the batter. Garlic powder adds a subtle garlicky essence, while paprika introduces a hint of smokiness and vibrant color. Salt is essential for bringing out the natural flavors of the onions and the batter, while black pepper adds a touch of heat. Together, these seasonings create a well-rounded flavor profile that elevates the onion rings to new heights.
Buttermilk and Egg
Buttermilk and egg are used as binding agents in the batter, contributing both moisture and richness. The acidity in buttermilk also helps to tenderize the onions, ensuring that they remain juicy and flavorful after frying. The egg provides additional structure and helps the batter adhere to the onion rings, creating a cohesive coating that crisps up beautifully during cooking.
Breadcrumbs (Panko)
For that extra crunch, panko breadcrumbs are highly recommended. These Japanese-style breadcrumbs are larger and flakier than traditional breadcrumbs, which allows them to create a more textured coating. The larger surface area of panko breadcrumbs provides a delightful crunch that is hard to resist. When fried, they become golden and crispy, offering a satisfying contrast to the tender onions inside.
Oil for Frying
The choice of oil for frying is crucial in achieving the perfect onion rings. Oils with high smoke points, such as vegetable oil, canola oil, or peanut oil, are ideal for frying. These oils can withstand the high temperatures needed to fry the onion rings without burning, ensuring a crispy exterior. Maintaining the right frying temperature is essential—too low, and the onion rings may absorb excess oil; too high, and they could burn before cooking through.
Preparation Steps for Perfect Onion Rings
Now that we have a clear understanding of the key ingredients, it’s time to delve into the preparation steps for creating the perfect onion rings. Following these detailed instructions will help ensure that your onion rings turn out crispy, flavorful, and visually appealing.
Slicing the Onions
Begin by selecting fresh yellow onions. For the best results, it’s crucial to slice the onions evenly. Aim for rings that are about 1/4 inch thick. This uniformity ensures even cooking, preventing some rings from becoming overcooked while others remain undercooked. To slice the onions, first, peel off the outer skin, then cut off both ends. Place the onion on a cutting board, and cut it in half from top to bottom. Lay the flat side down for stability and slice into rings. Set the rings aside, and separate them gently to avoid breaking.
Crafting the Batter
Next, it’s time to create the batter that will coat the onion rings. Start by combining the dry ingredients in a mixing bowl. Add the all-purpose flour, baking powder, garlic powder, paprika, salt, and black pepper. Whisk the dry ingredients together until they are well-combined.
In a separate bowl, prepare the wet ingredients. Whisk together the buttermilk and egg until fully blended. Gradually add the wet mixture to the dry ingredients, stirring until just combined. Be careful not to overmix; a few lumps are perfectly acceptable. The batter should have a thick yet pourable consistency, similar to that of pancake batter. If the batter seems too thick, you can thin it out with a splash of additional buttermilk.
The Breading Process
Once your batter is ready, it’s time to bread the onion rings. Start by placing panko breadcrumbs in a shallow dish or plate. Dip each onion ring into the batter, ensuring that it is fully coated. Allow any excess batter to drip off before transferring the onion ring to the plate with breadcrumbs.
To achieve an even coating, gently press the breadcrumbs onto the onion ring. This technique ensures that the breadcrumbs adhere well to the batter, creating a crunchy exterior. Place the coated onion rings on a baking sheet lined with parchment paper. Repeat the process until all the onion rings are coated.
By following these initial steps, you are well on your way to preparing delicious, crispy golden brown onion rings that are perfect for any occasion. Stay tuned for the next section, where we will discuss the frying process, tips for achieving the perfect crunch, and serving suggestions to make your homemade onion rings truly unforgettable.
Frying Techniques for Crispiness
When it comes to achieving that perfect crispy texture in your onion rings, choosing the right frying method is crucial. There are two primary techniques: shallow frying and deep frying, each with its pros and cons.
Shallow vs. Deep Frying
Shallow Frying involves using a small amount of oil, typically just enough to cover the bottom of the pan. This method is great for smaller batches and allows for more control over the cooking process. However, it can be challenging to get even cooking across all onion rings, and you may need to flip them frequently.
Deep Frying, on the other hand, requires submerging the onion rings completely in hot oil. This method often yields superior results because the oil cooks the rings evenly and quickly, resulting in a uniformly crispy exterior. While it uses more oil, the benefits in texture and flavor often outweigh the downsides.
Importance of Oil Temperature and Testing Methods
The key to perfectly crispy onion rings lies in the oil temperature. If the oil is too cold, the onion rings will absorb oil and become greasy. If it’s too hot, they can burn before cooking through. Aim for a temperature between 350°F and 375°F (175°C – 190°C) for optimal frying.
To test the oil temperature, drop a small piece of batter into the oil. If it sizzles and rises to the surface, the oil is ready. Alternatively, you can use a kitchen thermometer for accuracy.
How to Know When Oil is Ready for Frying
A reliable method to check oil readiness involves the “wooden spoon test.” Simply place the handle of a wooden spoon into the oil. If bubbles form around the tip, the oil is hot enough for frying. This simple trick can save you from undercooked or overcooked onion rings.
Best Practices for Frying Onion Rings
1. Preheat the Oil: Always ensure your oil is hot before adding the onion rings.
2. Use a Heavy-Bottomed Pot or Deep Fryer: This helps maintain a consistent temperature throughout the frying process.
3. Coat Evenly: Ensure each ring is evenly coated in batter for consistent frying.
4. Fry in Batches: Avoid overcrowding the pan; this can lower the oil temperature and lead to soggy onion rings.
Importance of Not Overcrowding the Pan
When frying, it’s essential to give your onion rings enough space. Frying in small batches allows the oil temperature to remain consistent, ensuring each ring gets the attention it needs to achieve that beautiful golden brown color. Overcrowding not only affects the cooking time but can also lead to uneven frying.
Tips for Achieving an Even Golden Brown Color
To ensure your onion rings are a perfect golden brown, keep these tips in mind:
– Monitor the Color: Keep an eye on the color of your onion rings. Once they start turning golden, they are close to being done.
– Flip as Needed: For shallow frying, flip the rings halfway through cooking to achieve an even color.
– Drain Properly: Once fried, allow the rings to drain on paper towels to remove excess oil, which can affect the final color and crunch.
Draining and Serving Onion Rings
Once your onion rings are perfectly fried, the next step is to drain them properly and serve them in a way that highlights their deliciousness.
Steps to Properly Drain Excess Oil
After frying, use a slotted spoon to remove the onion rings from the oil. Place them on a plate lined with paper towels to absorb any excess oil. This step is critical; too much oil can make your onion rings soggy rather than crispy.
Importance of Serving Temperature for Optimal Crunch
For the best experience, serve onion rings immediately after frying. They are at their crispiest when served hot, as cooling can lead to steam build-up, which makes them lose that delightful crunch. If you need to keep them warm, place them in a preheated oven at a low temperature (around 200°F or 95°C) while you finish frying the rest.
Suggestions for Serving Styles and Presentation Ideas
Presentation can elevate your onion rings from simple snacks to a gourmet treat. Consider these serving ideas:
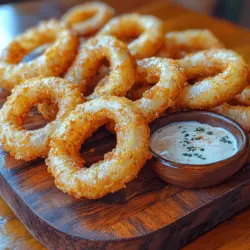
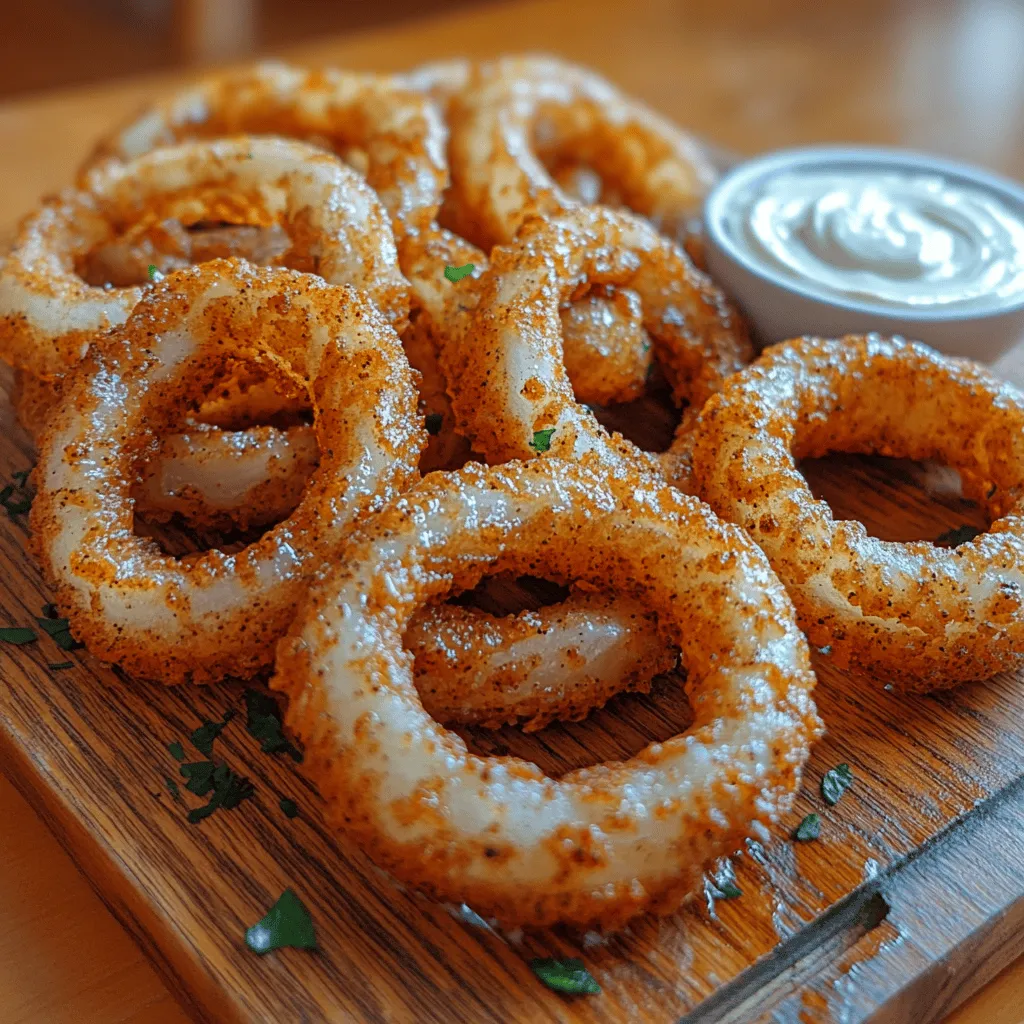
– Rustic Serving: Use a wooden board or slate platter for a rustic appeal. Pile the onion rings high and sprinkle with sea salt.
– Dipping Station: Create a dipping station with various sauces (more on that below) and let guests choose their favorites.
– Garnishes: Add fresh herbs like parsley or dill on top to enhance the visual appeal and add a touch of freshness.
Pairing Dipping Sauces
No onion ring is complete without a delicious dipping sauce to complement its flavor. Here are some classic and creative options to consider for your crispy creations.
Overview of Popular Dipping Sauces for Onion Rings
Dipping sauces can enhance the flavor profile of your onion rings, adding a punch of zest or a creamy contrast. Here are some popular options:
Classic Options
1. Ranch Dressing: A classic pairing, ranch dressing offers a creamy, herby flavor that complements the crunch of the onion rings.
2. Spicy Mayonnaise: Combine mayonnaise with sriracha or hot sauce for a spicy kick that balances well with the sweetness of the onions.
Creative Variations
1. Garlic Aioli: This creamy dip combines mayonnaise, garlic, and lemon juice for a flavorful twist.
2. Barbecue Sauce: Sweet and tangy, barbecue sauce pairs beautifully with onion rings and adds a smoky flavor.
3. Sweet Chili Sauce: For those who enjoy a sweet and spicy combo, sweet chili sauce is an excellent choice.
How to Prepare a Quick Homemade Dipping Sauce
Creating a quick dipping sauce at home is simple and can elevate your onion rings significantly. Here’s a basic recipe for a garlic aioli:
Ingredients:
– 1/2 cup mayonnaise
– 2 cloves garlic, minced
– 1 tablespoon lemon juice
– Salt and pepper to taste
Instructions:
1. In a bowl, combine mayonnaise, minced garlic, and lemon juice.
2. Mix well until smooth.
3. Season with salt and pepper to taste.
4. Serve immediately or refrigerate for up to an hour to allow flavors to meld.
Nutritional Information
Understanding the nutritional content of your homemade onion rings can help you enjoy them without guilt. Here’s a breakdown of the calories and some dietary considerations.
Breakdown of Calories and Nutritional Content per Serving
A serving of homemade crispy onion rings (about 5 rings) typically contains around 150-200 calories, depending on the batter and frying method used. Here’s a general breakdown:
– Calories: Approximately 150-200
– Fat: 8-12g (mostly from frying)
– Carbohydrates: 20-25g
– Protein: 2-3g
Discussion on Dietary Considerations
Onion rings can easily fit into various dietary plans. They are vegetarian-friendly and can be made gluten-free by using gluten-free flour and breadcrumbs. For healthier alternatives, consider baking instead of frying, although this may alter the taste and texture.
Conclusion
Making homemade crispy onion rings is a satisfying endeavor that can bring the comfort of a diner to your kitchen. The process might seem daunting at first, but with the right techniques and a bit of practice, you can achieve restaurant-quality results.
Don’t hesitate to experiment with different batters and spices to find your perfect flavor profile. Whether served as a snack, appetizer, or side dish, onion rings can complement a variety of meals and gatherings. Share your experiences and variations with family and friends, and enjoy the joy that homemade food can bring.