Introduction
Mini Cheesecake Fruit Cups are a delightful dessert option that perfectly marries the rich, creamy goodness of cheesecake with the refreshing burst of fresh fruit. These charming little cups are not only visually appealing but also versatile, making them an ideal choice for various occasions such as parties, family gatherings, and special celebrations. Whether you’re hosting a summer barbecue, planning a birthday party, or simply indulging in a sweet treat at home, these mini cheesecakes are sure to impress your guests and satisfy your cravings.
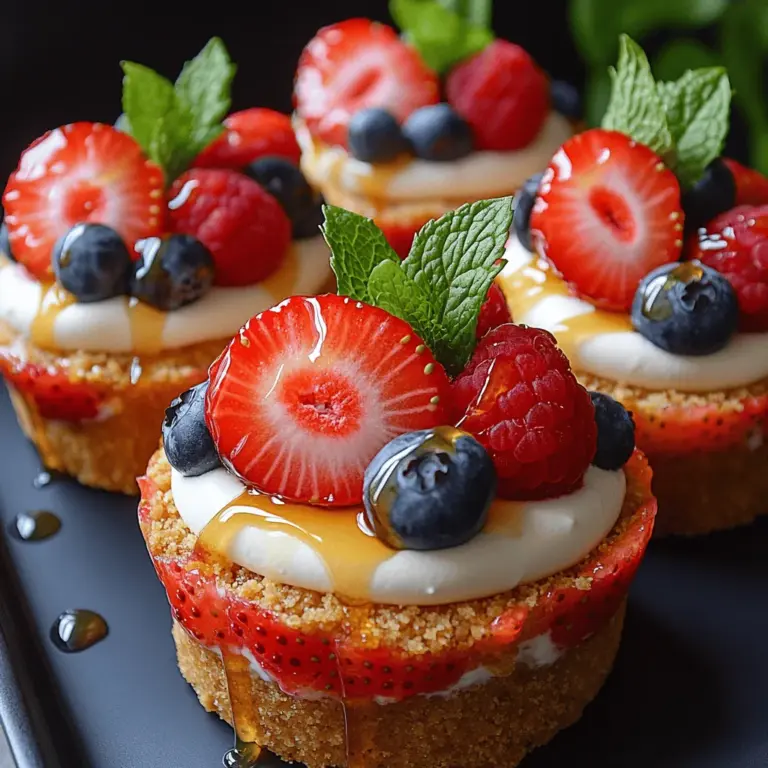
The appeal of Mini Cheesecake Fruit Cups lies in their simplicity and adaptability. This recipe is accessible for both novice bakers and experienced culinary enthusiasts, allowing anyone to whip up a batch with minimal effort. The base consists of a buttery graham cracker crust, which provides a delightful crunch that complements the smooth, creamy cheesecake filling. Topped with an assortment of fresh berries, these cups offer a perfect balance of sweetness and tartness, making for a refreshing dessert that can be enjoyed any time of the year.
What sets these Mini Cheesecake Fruit Cups apart is their bite-sized nature, allowing everyone to indulge without feeling guilty. Each cup is a harmonious blend of textures and flavors, showcasing the luxurious creaminess of the cheesecake paired with the natural sweetness of strawberries, blueberries, and raspberries. As you embark on this culinary adventure, you’ll discover just how easy it is to create a dessert that looks as good as it tastes.
Understanding the Ingredients
To create the perfect Mini Cheesecake Fruit Cups, it’s essential to understand the role of each ingredient in the recipe. This knowledge will not only help you appreciate the flavors but also enable you to make any necessary substitutions based on your preferences or dietary requirements.
Cheesecake Filling Essentials
1. Cream Cheese: The star of the filling is cream cheese, which lends its rich, tangy flavor and creamy texture. It serves as the base ingredient that defines the cheesecake experience. Using full-fat cream cheese ensures a velvety smooth consistency that forms the backbone of this dessert.
2. Powdered Sugar: This ingredient plays a crucial role in sweetening the cheesecake filling. Powdered sugar dissolves easily, creating a smooth texture without any graininess. It balances the tanginess of the cream cheese, adding just the right amount of sweetness.
3. Vanilla Extract: A splash of vanilla extract enhances the flavor profile of the cheesecake filling. This ingredient adds depth and complexity, making each bite more enjoyable. Opt for pure vanilla extract for the best results, as it offers a more robust flavor compared to imitation vanilla.
4. Heavy Whipping Cream: To achieve a light and airy texture, heavy whipping cream is essential. Whipping this cream until soft peaks form introduces air into the mixture, resulting in a fluffy filling. This contrast in texture between the rich cream cheese and the airy whipped cream elevates the overall experience of the cheesecake.
Crafting the Graham Cracker Crust
1. Graham Cracker Crumbs: The foundation of the Mini Cheesecake Fruit Cups is the graham cracker crust. These crumbs provide a sweet, buttery flavor with a satisfying crunch. Using finely crushed graham crackers ensures an even texture throughout the crust.
2. Unsalted Butter: Butter acts as the binding agent for the crust, bringing richness and moisture. It helps to hold the crumbs together, ensuring that the crust maintains its shape while providing a delectable buttery flavor.
3. Sugar: A touch of sugar is added to the crust to enhance its sweetness, balancing the flavors of the graham crackers and butter. This small addition makes a significant difference in the overall taste of the crust.
The Fruit Topping
1. Mixed Berries: Fresh berries are essential for topping the Mini Cheesecake Fruit Cups. A mix of strawberries, blueberries, and raspberries not only adds vibrant color but also provides numerous health benefits. Berries are rich in antioxidants, vitamins, and dietary fiber, making them a nutritious choice for dessert.
2. Honey or Maple Syrup: To enhance the natural sweetness of the berries, consider drizzling a bit of honey or maple syrup over the top. These natural sweeteners bring a unique flavor profile and can be adjusted based on your sweetness preference.
3. Fresh Mint Leaves: For added visual appeal and a hint of aromatic freshness, garnish the cups with fresh mint leaves. This simple addition elevates the presentation and provides a refreshing contrast to the sweetness of the cheesecake and berries.
Preparing the Graham Cracker Crust
Now that we’ve explored the ingredients, let’s dive into the preparation of the graham cracker crust, a crucial step in crafting the Mini Cheesecake Fruit Cups.
Step 1: Combine Ingredients
Begin by gathering your ingredients for the crust: graham cracker crumbs, unsalted butter, and sugar. In a mixing bowl, combine 1 cup of graham cracker crumbs with 2 tablespoons of sugar. Melt 4 tablespoons of unsalted butter and pour it into the bowl. Mix the ingredients together until the crumbs are evenly coated and the mixture resembles wet sand. This ensures that the crust will hold together once pressed into the cups.
Step 2: Achieve the Right Texture
To achieve the desired texture for your crust, it’s essential to ensure that the crumbs are uniformly combined with the butter. Use a fork or your fingers to break up any clumps, ensuring that each crumb is moist. This step is critical for creating a firm crust that won’t crumble when you fill the cups with cheesecake.
Step 3: Press the Crust into Cups
Once you have the crust mixture ready, it’s time to press it into your serving cups. You can use mini dessert cups, muffin tins, or even shot glasses for a fun presentation. Take a tablespoon of the crust mixture and place it into the bottom of each cup. Using the back of a spoon or your fingers, firmly press the mixture down to create an even layer. Ensure that the crust is distributed evenly across the bottom and slightly up the sides of the cup for a more appealing look.
Step 4: Allow the Crust to Set
After pressing the crust into each cup, it’s important to let it set. Refrigerate the cups for at least 30 minutes. This chilling time allows the butter to harden, creating a firm base for the cheesecake filling. While the crust sets, take this opportunity to prepare your cheesecake filling, ensuring a seamless transition from crust to filling.
Creating the Cheesecake Filling
With the crust prepared and chilling in the fridge, it’s time to focus on creating the luscious cheesecake filling. This step requires some attention to detail to achieve that perfectly smooth and fluffy texture.
Step 1: Soften the Cream Cheese
To begin, ensure that your cream cheese is at room temperature. Softening the cream cheese is essential for easy blending and to avoid lumps in your filling. If you forgot to take it out ahead of time, you can cut it into smaller cubes and microwave it for 10-15 seconds. Just be cautious not to melt it; you want it soft, not liquid.
Step 2: Beat the Cream Cheese
In a large mixing bowl, add the softened cream cheese and beat it with an electric mixer on medium speed. Beat until the cream cheese is smooth and creamy, about 2-3 minutes. This step is crucial for eliminating any lumps and ensuring a silky texture in your cheesecake filling.
Step 3: Add the Sugar and Vanilla
Once the cream cheese is smooth, gradually add the powdered sugar and vanilla extract. Continue to mix until fully incorporated, scraping down the sides of the bowl as needed. The mixture should be thick and creamy, with a sweet and aromatic flavor that will be the highlight of your Mini Cheesecake Fruit Cups.
Step 4: Incorporate the Heavy Whipping Cream
Next, it’s time to add the heavy whipping cream. Pour in 1 cup of heavy whipping cream and beat the mixture on medium-high speed until soft peaks form. This may take about 2-4 minutes. Be careful not to overbeat the cream; you want it to be light and fluffy, providing that airy texture that contrasts beautifully with the dense cream cheese.
Step 5: Combine the Mixtures
Once your heavy whipping cream reaches the desired consistency, gently fold it into the cream cheese mixture using a spatula. This folding technique helps maintain the airiness of the whipped cream, ensuring a light and fluffy cheesecake filling. Be gentle as you combine the two mixtures; you want to keep as much volume as possible.
With the graham cracker crust set and the cheesecake filling prepared, you are now ready to assemble your Mini Cheesecake Fruit Cups. The next steps will involve layering the cheesecake filling into the prepared crusts and topping them with fresh fruit, setting the stage for a dessert that is not only delicious but also visually stunning.

Incorporating Powdered Sugar and Vanilla
When it comes to achieving the perfect sweet flavor in your Mini Cheesecake Fruit Cups, incorporating powdered sugar and vanilla is crucial. Start by adding powdered sugar to your cream cheese mixture, but do so gradually. This method helps to avoid clumping and ensures a smoother consistency. Using a mixer on low speed, slowly blend in the powdered sugar until it’s fully incorporated. This not only sweetens the mixture but also adds a delightful creaminess that complements the tang of the cream cheese.
Next, introduce vanilla extract into the mixture. Vanilla adds a rich depth of flavor that enhances the overall taste of your cheesecake filling. Mix it in gently, allowing the vanilla to distribute evenly throughout the cream cheese and sugar. By taking the time to incorporate these ingredients carefully, you ensure a well-balanced flavor profile that will tantalize your taste buds.
Whipping Heavy Cream
The heavy cream is a key component in achieving that light and airy texture characteristic of classic cheesecakes. To whip heavy cream properly, start with a chilled bowl and beaters, as cold equipment helps achieve better volume. Pour the heavy cream into the bowl and begin whisking at a medium speed. The goal is to reach stiff peaks, which means that when you lift the whisk out of the bowl, the cream should hold its shape without collapsing.
Once you see the cream begin to thicken, gradually increase the speed to high. Be cautious not to over-whip, as this can turn your cream into butter. When you reach stiff peaks, it’s time to fold the whipped cream into your cream cheese mixture. The technique of folding is essential here; use a spatula to gently combine the two mixtures without deflating the whipped cream. This process maintains the lightness of the filling, ensuring that your Mini Cheesecake Fruit Cups are airy and delightful.
Combining Mixtures
Combining the whipped cream with the cream cheese mixture is a delicate but essential step. As you begin to fold, use a figure-eight motion, ensuring you scrape the bottom of the bowl to incorporate all ingredients evenly. The goal is to create a homogenous mixture without losing the volume of the whipped cream. This folding technique is what gives your cheesecake filling its fluffy texture, making each bite a creamy delight.
Assembling the Mini Cheesecakes
As you assemble your Mini Cheesecake Fruit Cups, presentation becomes key. Begin by preparing your dessert cups—these can be mini glasses, ramekins, or even muffin liners, depending on your creativity.
Filling the Dessert Cups: Use a piping bag for filling the cups if you’re looking for a professional touch. This allows for precise control and can create a beautiful layered effect. If you don’t have a piping bag, a simple spoon will work just as well. The important thing is to fill each cup evenly, ensuring that each one gets the same amount of that luscious cheesecake filling.
Smoothing the Tops: Once filled, take the back of a spoon or a spatula to smooth the tops of the filling. A smooth surface not only looks appealing but also provides a perfect base for your fruit topping, ensuring that the fruits adhere well and don’t slide off.
The Importance of Refrigeration: After assembling the cups, refrigeration is crucial. Chill the Mini Cheesecake Fruit Cups for at least 4 hours, or preferably overnight. This step allows the flavors to meld beautifully and gives the filling time to set properly. The result is a firm yet creamy cheesecake that holds its shape when served, providing an enjoyable eating experience.
Preparing the Fruit Topping
The fruit topping is what makes your Mini Cheesecake Fruit Cups vibrant and exciting. To prepare the fruit, start by selecting a mix of berries—strawberries, blueberries, raspberries, and blackberries work wonderfully together.
Tossing Berries with Honey or Maple Syrup: For an extra layer of flavor, toss your berries with a drizzle of honey or maple syrup. This adds a touch of sweetness that complements the tanginess of the cheesecake filling. Simply place the berries in a bowl, drizzle your chosen sweetener over them, and toss gently with a spoon. This step enhances the natural flavors of the fruit and creates a syrupy glaze that adds to the visual appeal.
Creative Ideas for Arranging the Fruit: When it comes to presentation, don’t hesitate to get creative! You can arrange the berries in a layered pattern, scatter them randomly, or even create artful swirls with the syrup. The colorful berries against the creamy cheesecake create a stunning contrast that will catch the eye of anyone at your gathering.
The Visual Appeal of Colorful Berries: The combination of the bright colors of the berries with the white cheesecake filling creates a visually stunning dessert. It’s not just about taste; the aesthetics of your Mini Cheesecake Fruit Cups play a significant role in the overall experience.
Garnishing and Serving Suggestions
To elevate your Mini Cheesecake Fruit Cups even further, consider garnishing them with fresh mint leaves. Not only do mint leaves add a pop of color, but they also introduce a refreshing contrast to the sweetness of the cheesecake and berries. Simply place a mint leaf on top of each cup before serving for an elegant touch.
Serving Immediately Versus Storing: These mini cheesecakes can be served immediately after assembly, but they taste even better after chilling. If you plan to serve them later, store them in the refrigerator to maintain their freshness. Make sure to cover them tightly with plastic wrap or a lid to prevent them from absorbing any odors from the fridge.
Ideas for Pairing: These Mini Cheesecake Fruit Cups pair beautifully with a variety of beverages. Consider serving them alongside a glass of sparkling wine, sweet tea, or a light dessert wine. They also complement other desserts like chocolate-covered strawberries or cookies, making them a versatile addition to any dessert table.
Nutritional Information and Health Benefits
While Mini Cheesecake Fruit Cups are a delightful indulgence, they also carry nutritional benefits thanks to the fruits used. Berries are packed with antioxidants, vitamins, and minerals that contribute to overall health. They’re low in calories and high in dietary fiber, making them a health-conscious choice for topping your cheesecakes.
Balance of Indulgence and Nutrition: This dessert strikes a perfect balance between indulgence and nutrition. The creamy cheesecake filling offers a sweet treat, while the fresh fruit topping provides essential nutrients.
Ingredient Substitutions: For those with dietary preferences, there are many ways to adapt this recipe. You can use gluten-free graham crackers for the crust, or substitute dairy cream cheese with a plant-based alternative for a dairy-free version. Coconut cream can replace heavy cream for a vegan option, allowing everyone to enjoy these delightful treats without compromise.
Conclusion
In summary, Mini Cheesecake Fruit Cups are an accessible, versatile, and delicious dessert option that’s perfect for any occasion. With a creamy filling, fresh fruit topping, and a beautiful presentation, these mini cheesecakes are sure to impress your guests while being easy to prepare.
Whether it’s for a birthday party, a holiday gathering, or simply a sweet treat to enjoy at home, these Mini Cheesecake Fruit Cups bring joy and satisfaction. The process of creating and sharing homemade treats not only fills your kitchen with delightful aromas but also creates memorable moments with loved ones. So gather your ingredients, unleash your creativity, and head into the kitchen to whip up a batch of these delightful desserts!
